Airbyte Local Deployment
System Requirements
To experiment with the ELT pipeline via local Airbyte instance, let's first ensure your computer is configured correctly.
Windows
For Windows users, the Windows Subsystem for Linux 2 (WSL2) must be installed. You must be running Windows 10 version 2004 or higher (build 19041 or higher), or Windows 11 to use the commands in this tutorial.
Open PowerShell or the Windows Command Prompt in
administratormode, then enter the following command to install WSL2:wsl --installNote: In case the installation command returns "This application requires the Windows Subsystem for Linux Optional Component", you should run:
Enable-WindowsOptionalFeature -Online -FeatureName Microsoft-Windows-Subsystem-LinuxRestart your machine after installation.
To ensure that WSL2 has been installed successfully, run the following command:
wsl -l -vExpected output:
  NAME                   STATE           VERSION
* Ubuntu                 Running         2
After you've set up WSL2 successfully, install
Docker desktop on Windowsby following the steps here.
Mac
Make sure you have Homebrew installed. If not you can follow the instructions listed here.
Make sure you have Docker Desktop installed. If not you can install it with Homebrew in your terminal:
brew install --cask docker
Linux
- In order to install Docker and
docker-composeon Linux, please follow the instructions listed here and choose your Linux distribution. Remember to also run the post-installation steps listed here.
Local Deployment
In this step, we'll deploy Airbyte locally on your machine. Make sure you have installed Docker and Docker Compose on your system as shown in the Overview section.
To deploy Airbyte locally, check out the KYVE Airbyte fork
git clone https://github.com/KYVENetwork/airbyte
cd airbyte
git checkout feat/mainnet-support
Then start Airbyte locally by running
./run-ab-platform.sh
After the deployment is complete, you'll be able to access the Airbyte UI at http://localhost:8000/. The default credentials are:
BASIC_AUTH_USERNAME=airbyte
BASIC_AUTH_PASSWORD=password
When you first access the Website, you will be directed to the onboarding screen. Enter an email to proceed.
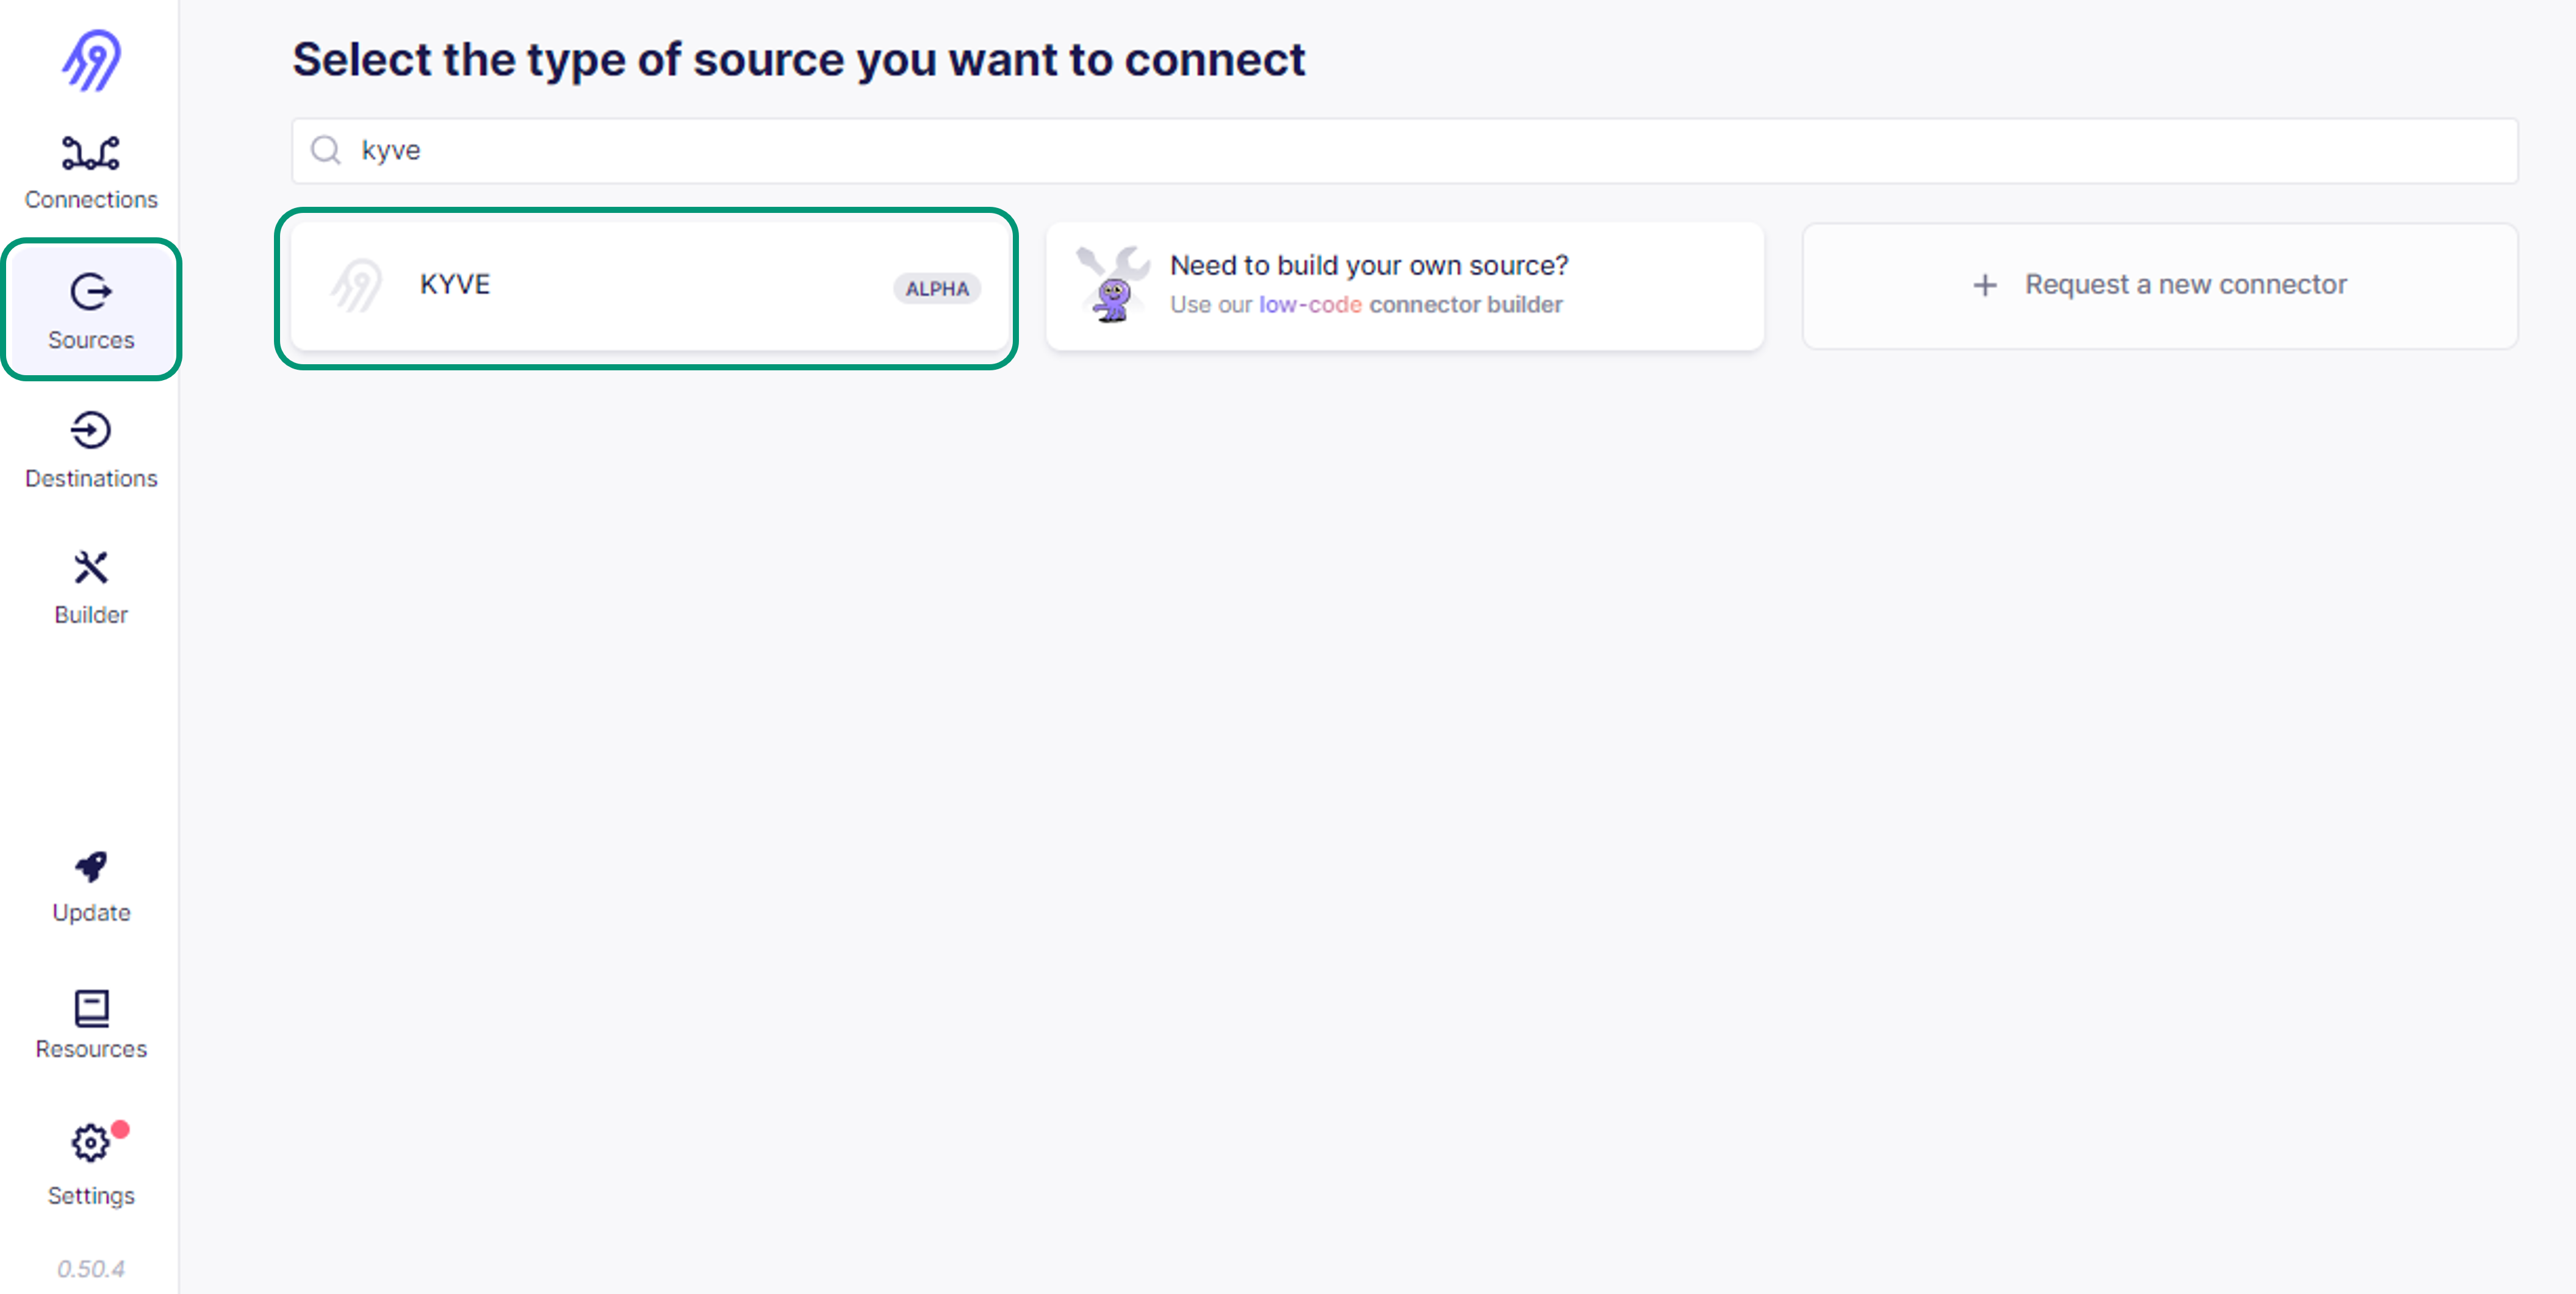
Load KYVE source
You can browse on the Sources page and search for the integrated KYVE source.
For using the latest KYVE source with custom modification you should build and load the source-kyve manually. See the following section for the instructions.
Custom-build KYVE source
If you wish to test a modified version of the KYVE source connector, follow these steps to build the connector and load it into Airbyte:
In a new terminal window change to the
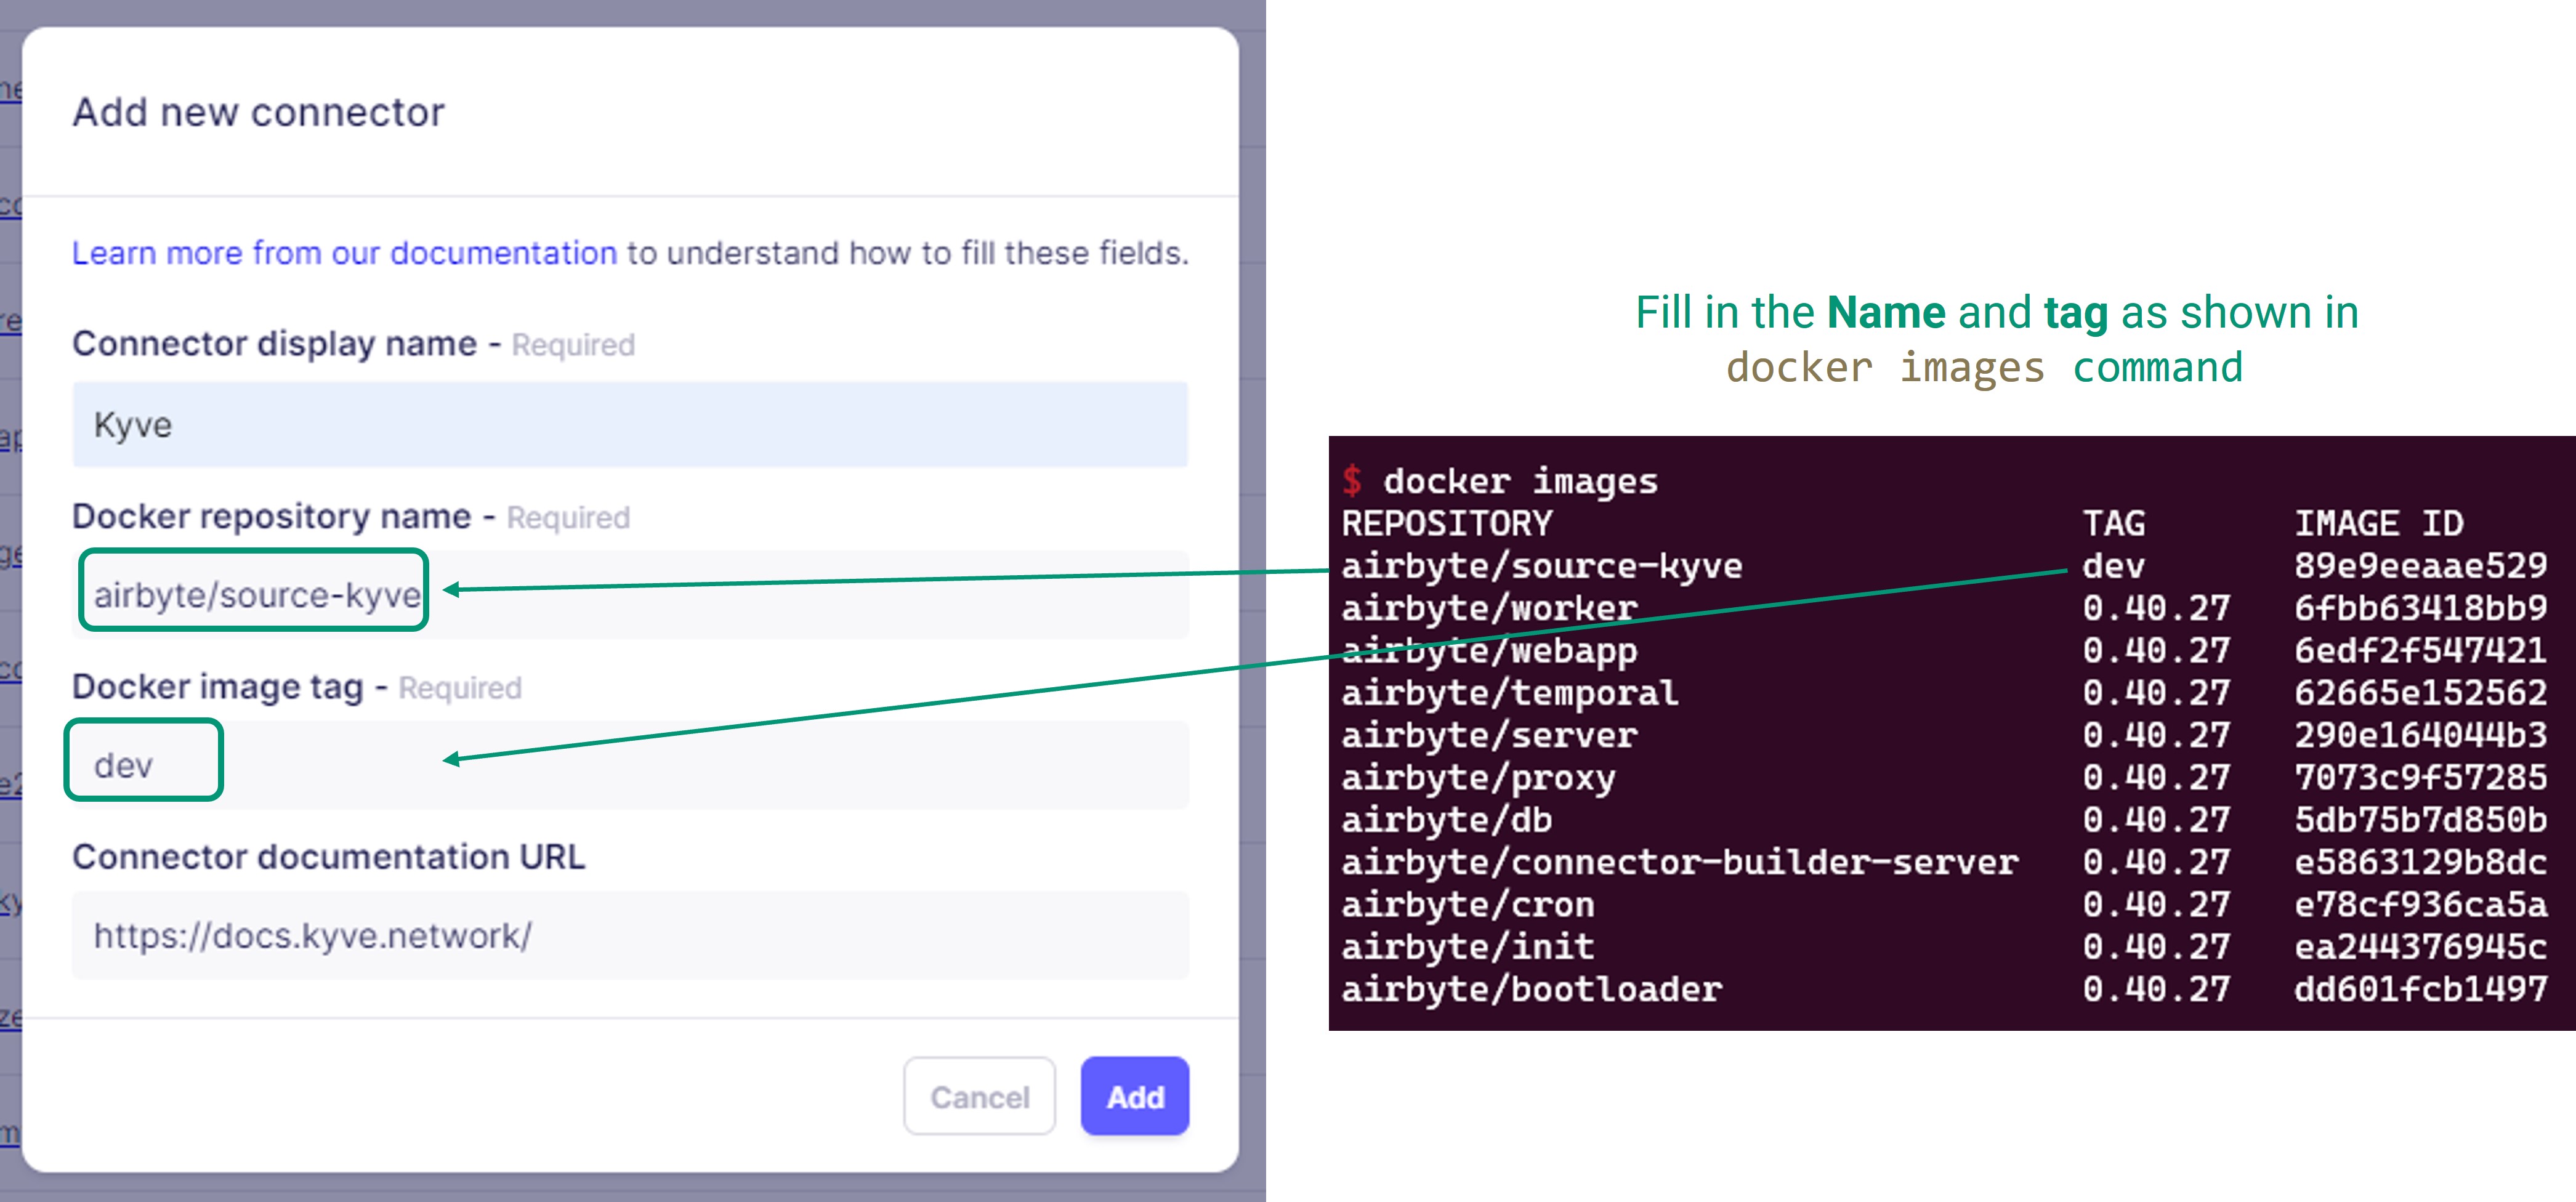
source-kyvedirectory:cd airbyte-integrations/connectors/source-kyveBuild the Docker image for the KYVE source:
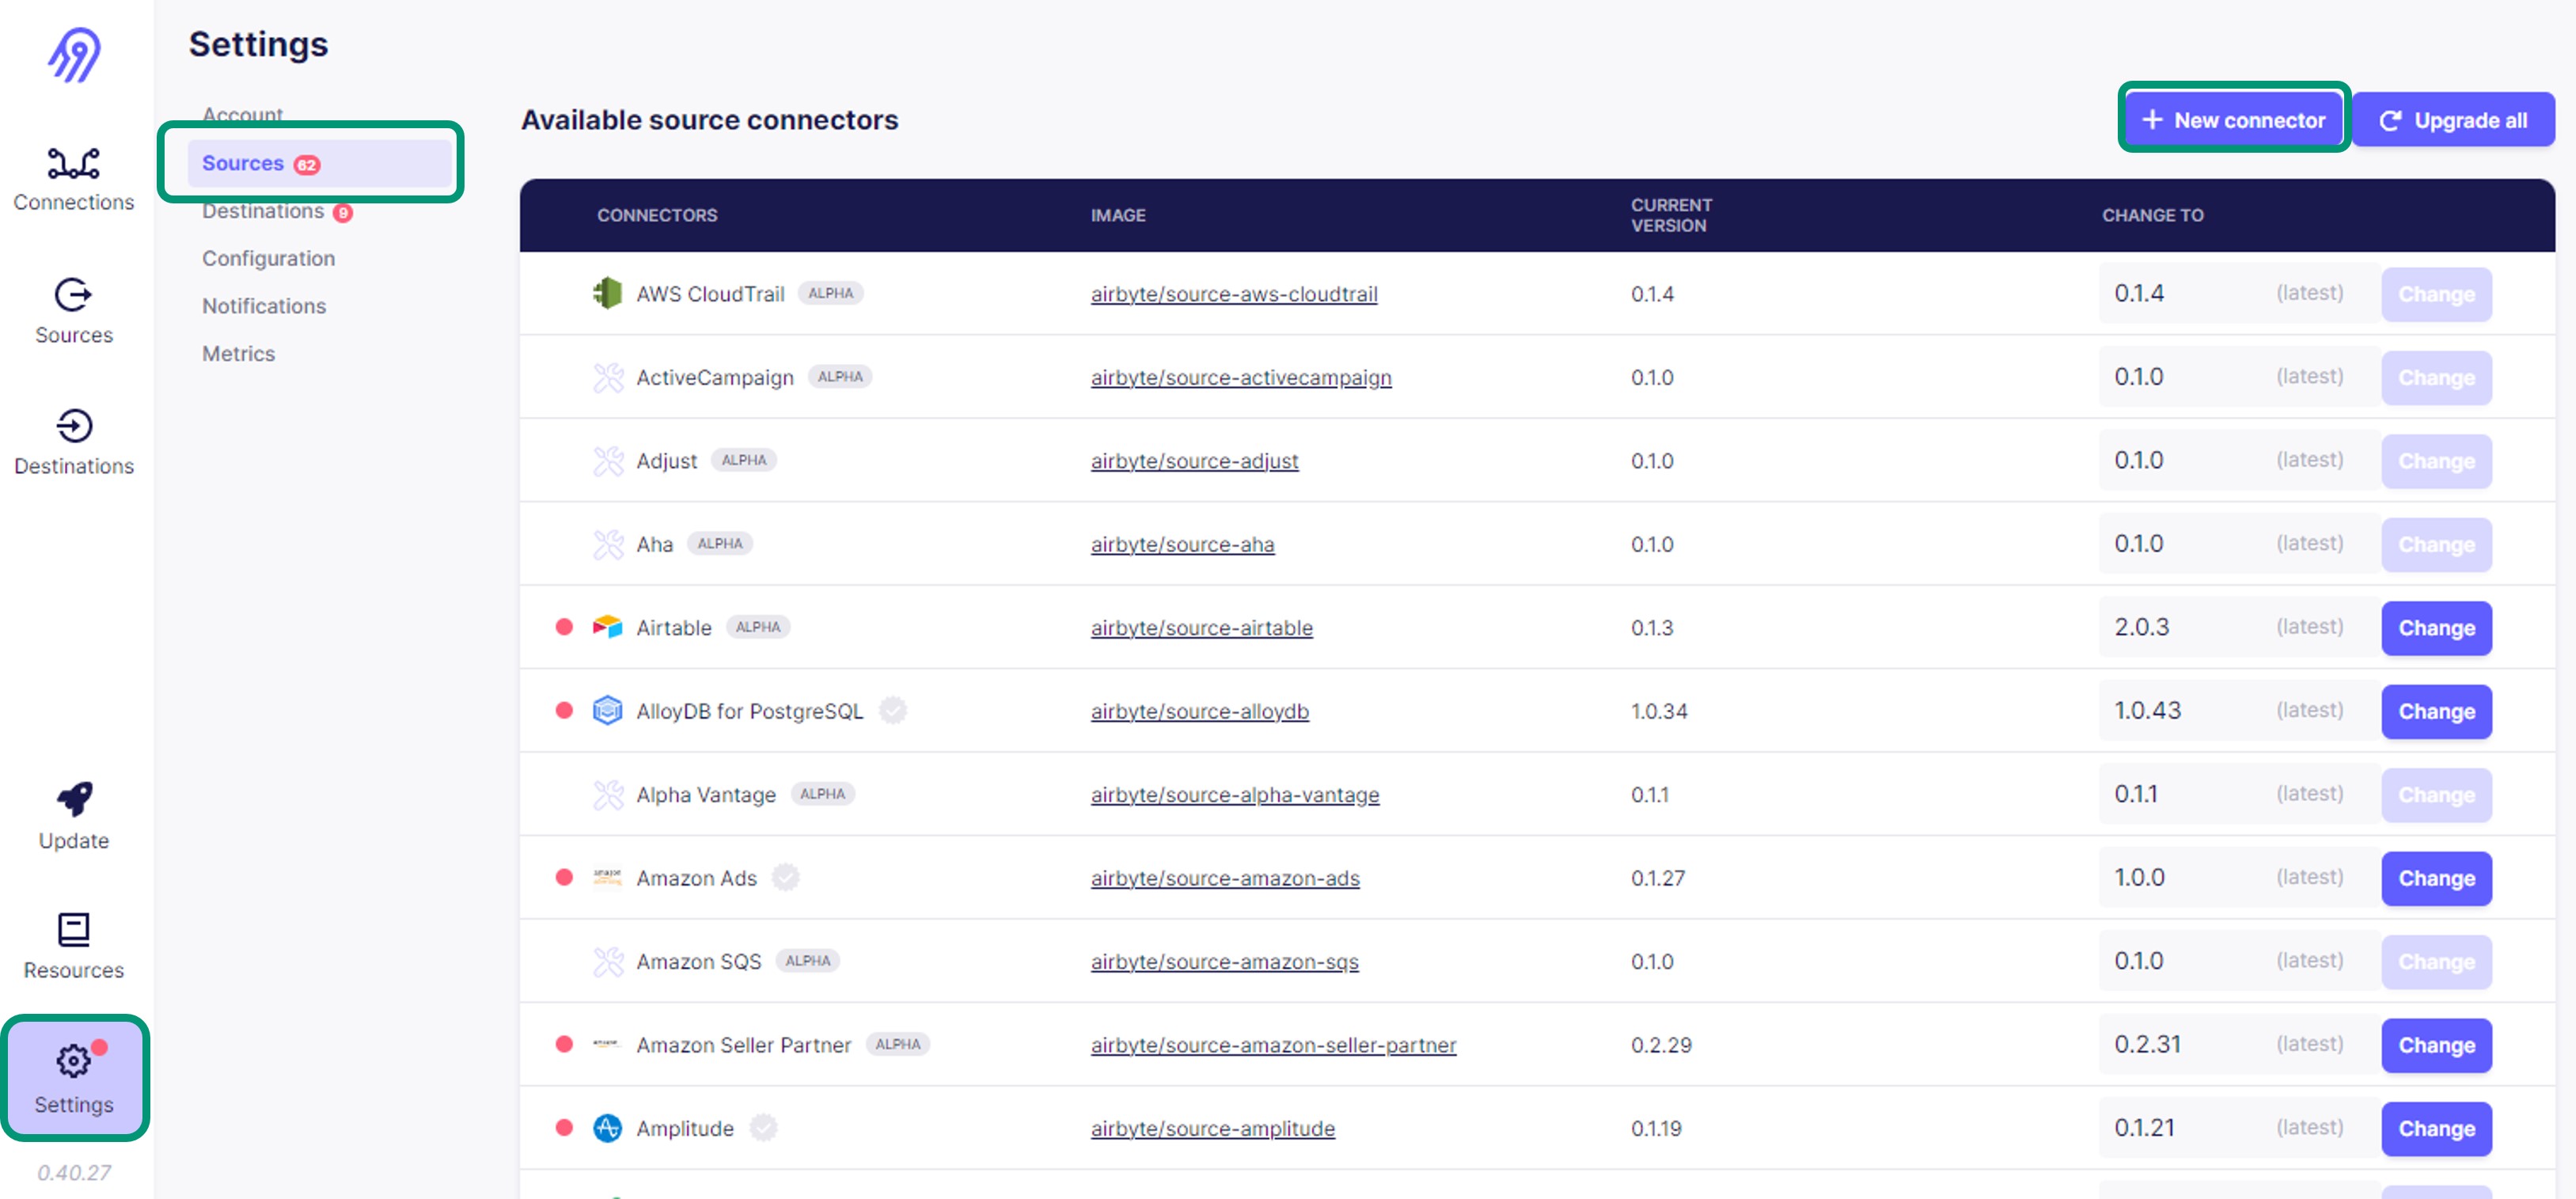
docker build . -t airbyte/source-kyve:devIn the Airbyte UI, navigate to the settings page and add a new source connector.
Fill out the fields as follows, then click Add:
- Connector display name:
KYVE(or any other name) - Docker repository name:
airbyte/source-kyve - Docker image tag:
dev - Connector documentation URL:
https://docs.kyve.network/
- Connector display name: